
Selling at the POS
The POS screen is built for the counter: find products fast, take payment, and move on to the next customer. This page follows one sale from start to finish.
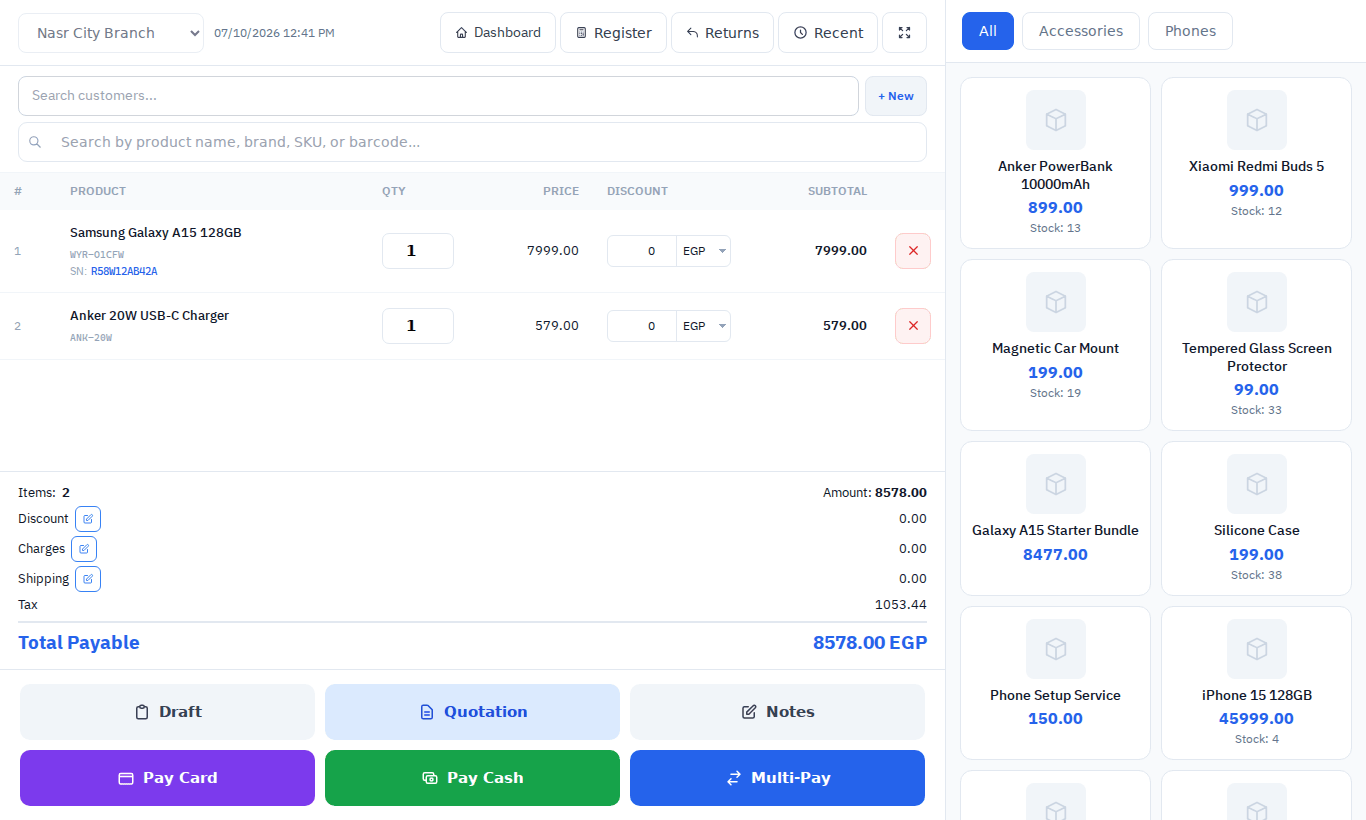
Before you start
- Your register must be open.
- Check the location in the top-left corner. It starts on your own branch; stock is taken from whichever location is chosen here.
Add products
There are three ways to add a product, and you can mix them:
| Method | How |
|---|---|
| Scan | Scan the barcode into the product search box. An exact barcode or SKU adds the product straight away. |
| Search | Type part of the name, brand, SKU or barcode and click a result. |
| Browse | Click a product tile on the right. Filter the tiles with the category buttons at the top. Each tile shows the price and the stock at the chosen location. |
Search results show the product name with its SKU, brand and barcode underneath. The price and currency align with the name on the right, with available stock underneath.
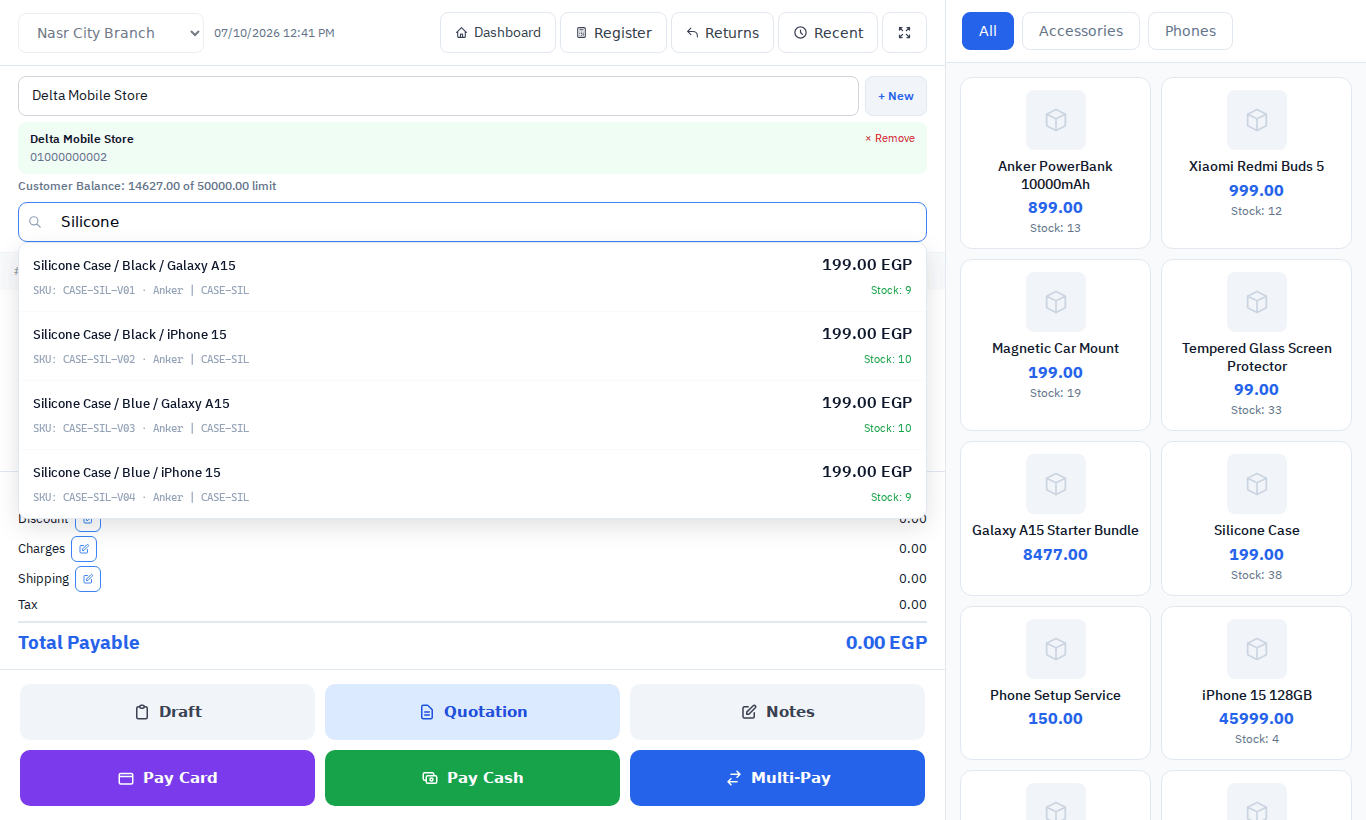
- Adding the same product again increases its quantity by 1.
- Variable products: search for them. Each variant is listed on its own line with its SKU and price. The browse tile shows its variants’ combined available stock; click it to choose a variant. Out-of-stock variants are greyed out.
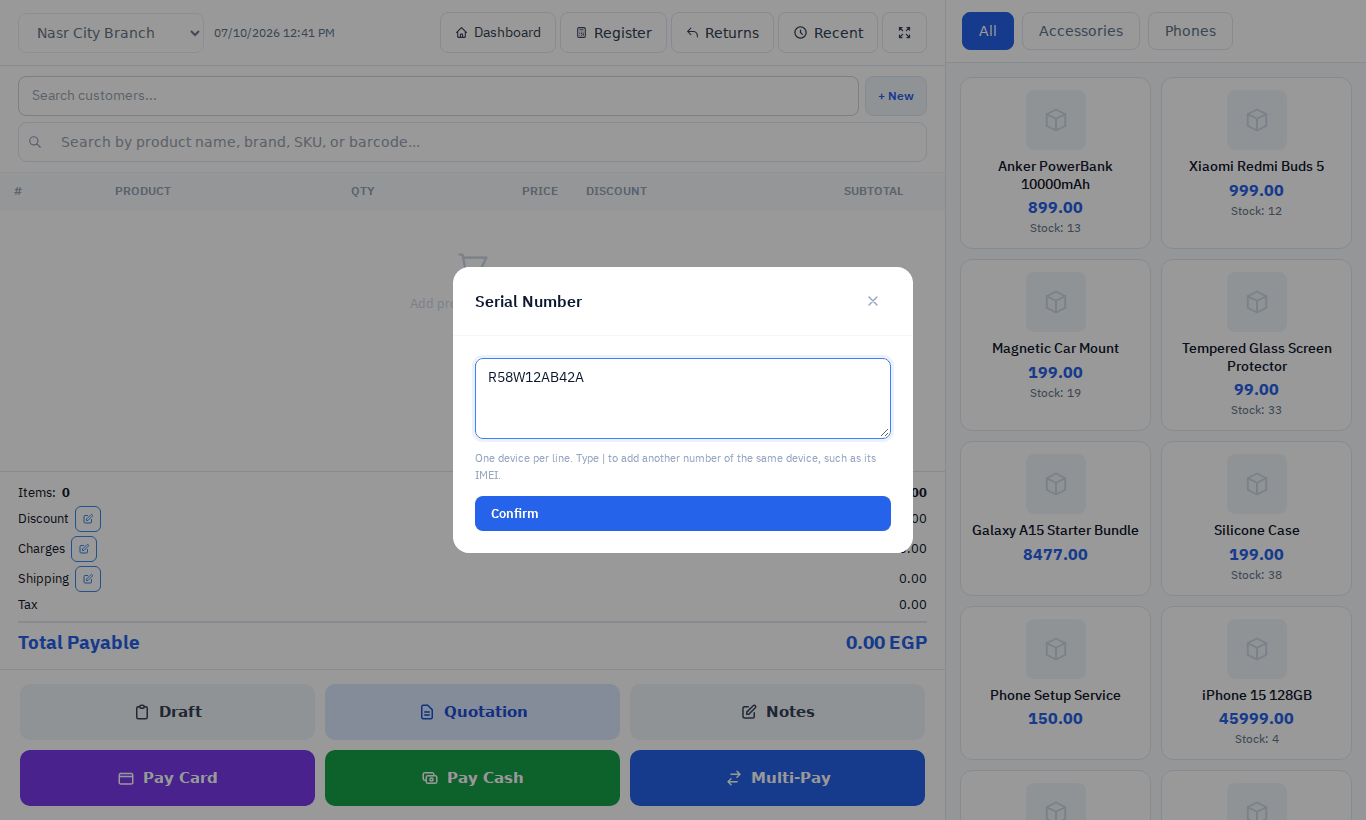
- Serial numbers: for a product with serial numbers enabled, the POS asks for the unit's serial before adding it. A phone's IMEIs go on the same line after a
|; see Phones: serial and IMEIs.
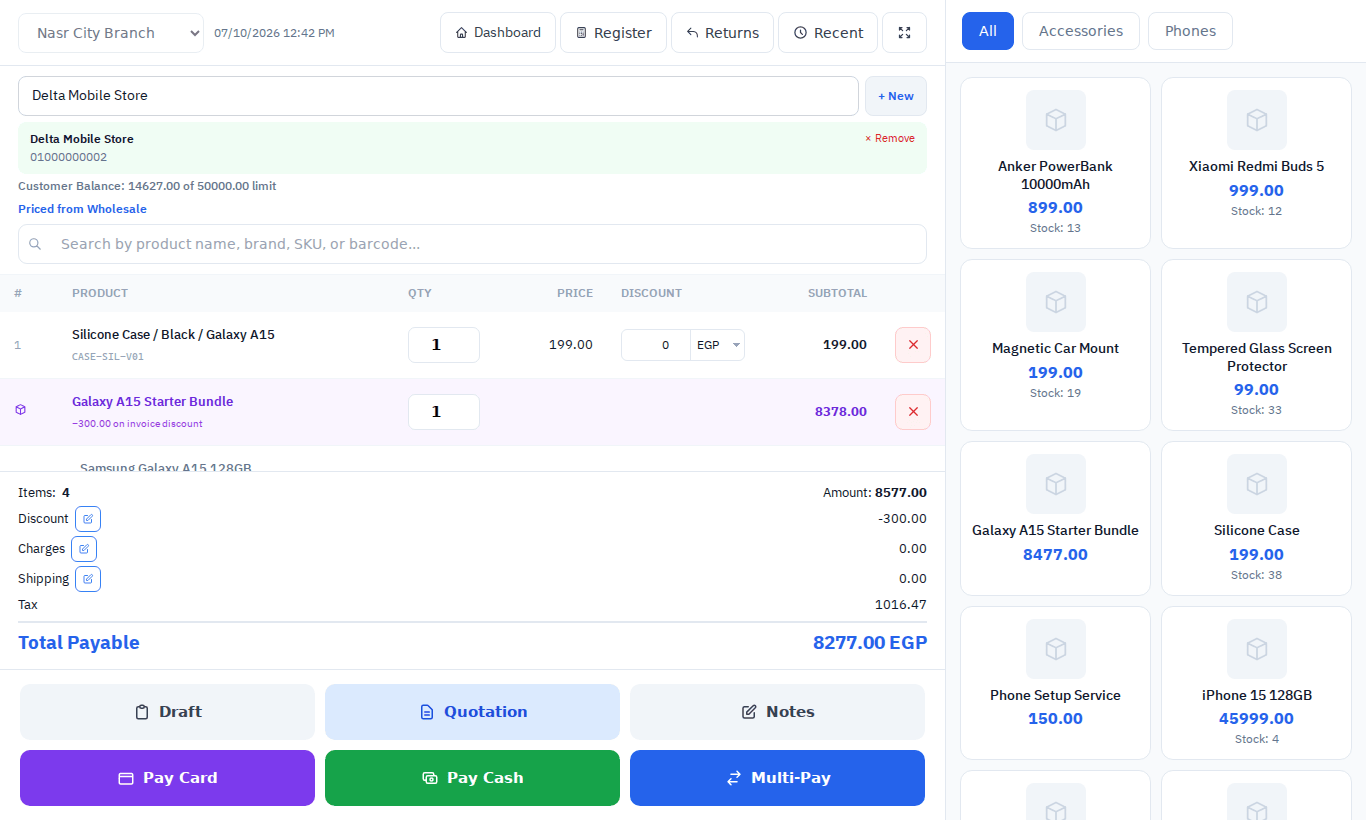
- Combos: a combo is added as its component lines, grouped under the combo's name. A fixed combo discount is shown as on invoice discount. See Combo products.
Products with Manage Stock enabled use the selected location’s available quantity, excluding stock reserved by proforma invoices. Out-of-stock search results are greyed out and cannot be selected; scanning their barcode or SKU shows an out-of-stock alert. Repeated scans and quantity changes cannot exceed the available quantity. Completing the sale checks stock again, so another cashier selling the last unit cannot make your sale oversell. Products without Manage Stock enabled can still be sold without stock.
Products that are inactive, drafts, or marked Not for selling never appear.
Adjust the cart
| To | Do |
|---|---|
| Change a quantity | Type in the Qty box. Units that don't allow decimals accept whole numbers only. |
| Discount one line | Enter an amount in the line's Discount box and choose fixed or %. |
| Remove a line | Click the red ×. For a combo, remove the whole combo from its header line. |
Manual line discounts use a combined amount and currency/% control and include tax.
Discounts set up in Discounts are applied to matching lines automatically, and price lists re-price the cart when you choose a customer who has one.
Keying in a discount — a line's Discount box or the sale's discount — needs the POS Apply Discount permission. Without it those controls are hidden and line discounts show as text; automatic discounts and combo prices still apply, because the till sets them, not the cashier.
Choose a customer (optional)
Use the customer search box beside + New at the top of the cart to search by name, company, phone, email or tax number, as on Add Sale. Results show their contact details and balance. Click + New to add a customer without leaving the POS; saving selects them for the current sale. This button needs the same permission to create sales as Add Sale. Leave the field empty for a walk-in sale.
Click × Remove to clear the customer, or start typing another search to replace them. Typing over a chosen customer clears that selection and its shipping address immediately.
Choosing a customer:
- applies their price list, if they have one ("Priced from …" appears);
- records who owes the balance if the sale is not fully paid — ekPOS does not insist on it, so always choose the customer before selling on credit;
- shows what they owe against their credit limit, if they have one, in red once they are over it. Business Settings chooses whether an over-limit sale is refused or saved with a warning;
- decides the printed document: a customer with a tax number gets a Sales Invoice, anyone else a Sales Receipt.
Once a sale is saved the customer is cleared, along with the notes and the discount, charges and shipping boxes, so each sale starts fresh. To serve the same customer again, choose them again.
Discount, charges, shipping and notes
The pencil buttons beside Discount, Charges and Shipping open small forms:
- Discount — a fixed amount or percentage off the whole sale. It comes off the total including tax, and the VAT shown drops with it, so the saved sale is exactly what you charged.
- Charges — an extra amount with a description, such as installation.
- Shipping — a cost, a status (Ordered, Packed, Shipped, Delivered, Returned) and a delivery address with the same fields as on Add Sale; tick Same as customer to copy the customer's shipping address field by field. A started address needs every field marked ✱, or the sale is refused with a message naming the missing one. The sale then appears on Shipments.
- Notes — a note printed on the sale, and staff notes that are not printed.
Changing or removing the customer unticks Same as customer shipping information and clears the delivery address, including an address you have already applied. Tick the box again to copy the new customer’s address, or enter a new one.
Any discount — a line discount or a sale discount — needs the POS → Apply Discount permission. Without it the sale is refused with You do not have permission to apply a discount. A line sold below the price the till shows (the product's or variant's price, the customer's price list, or a combo's share) counts as a discount too, unless an automatic discount for that product covers the difference.
A discount cannot be larger than what it comes off: a line discount above its line, or a sale discount and rounding that would take the total below zero, is refused before anything is saved. Rounding is limited to 1.00 up or down, and rounding a total down counts as a discount, so it needs the same permission.
Take payment
The total to pay is shown in Total Payable. Choose how the customer pays:
| Button | Use |
|---|---|
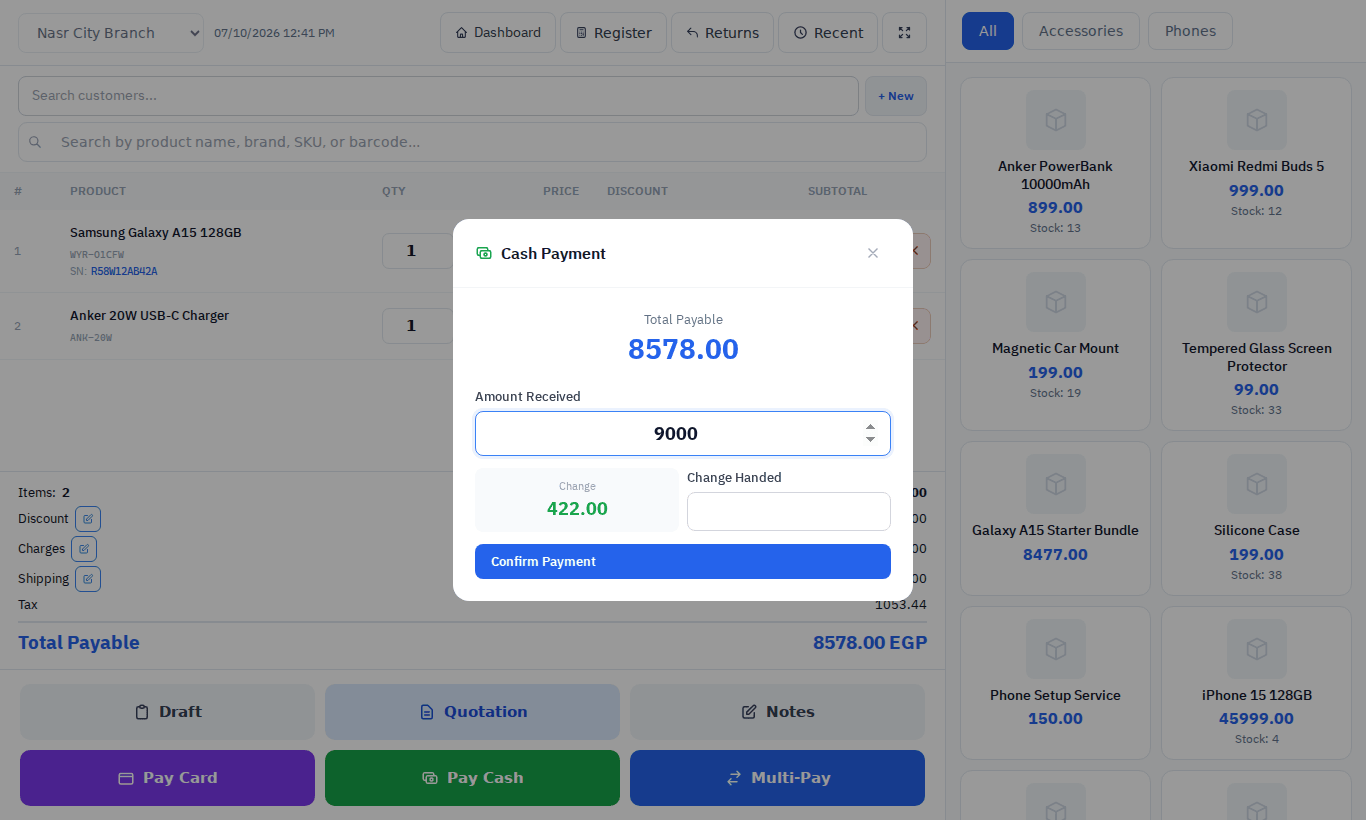
| Pay Cash | Enter the Amount Received. ekPOS shows the Change to give back; record what you actually handed back in Change Handed if it differs. The amount received must cover the total. |
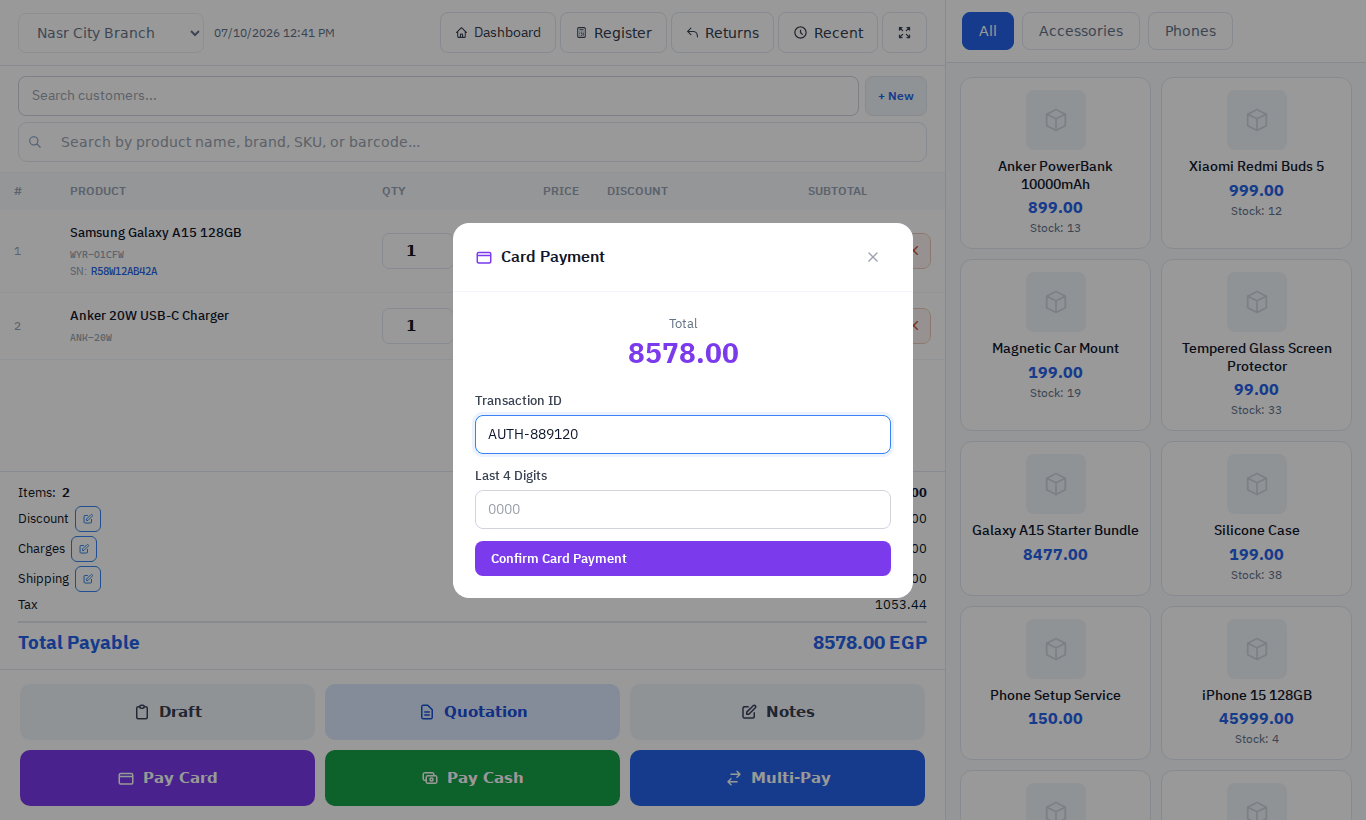
| Pay Card | Optionally enter the card's last 4 digits and the terminal's transaction ID, then confirm. The full total is charged to the card. |
| Multi-Pay | Split the payment across several payment methods: add a line per method with its amount. Remaining shows what is still unpaid. |
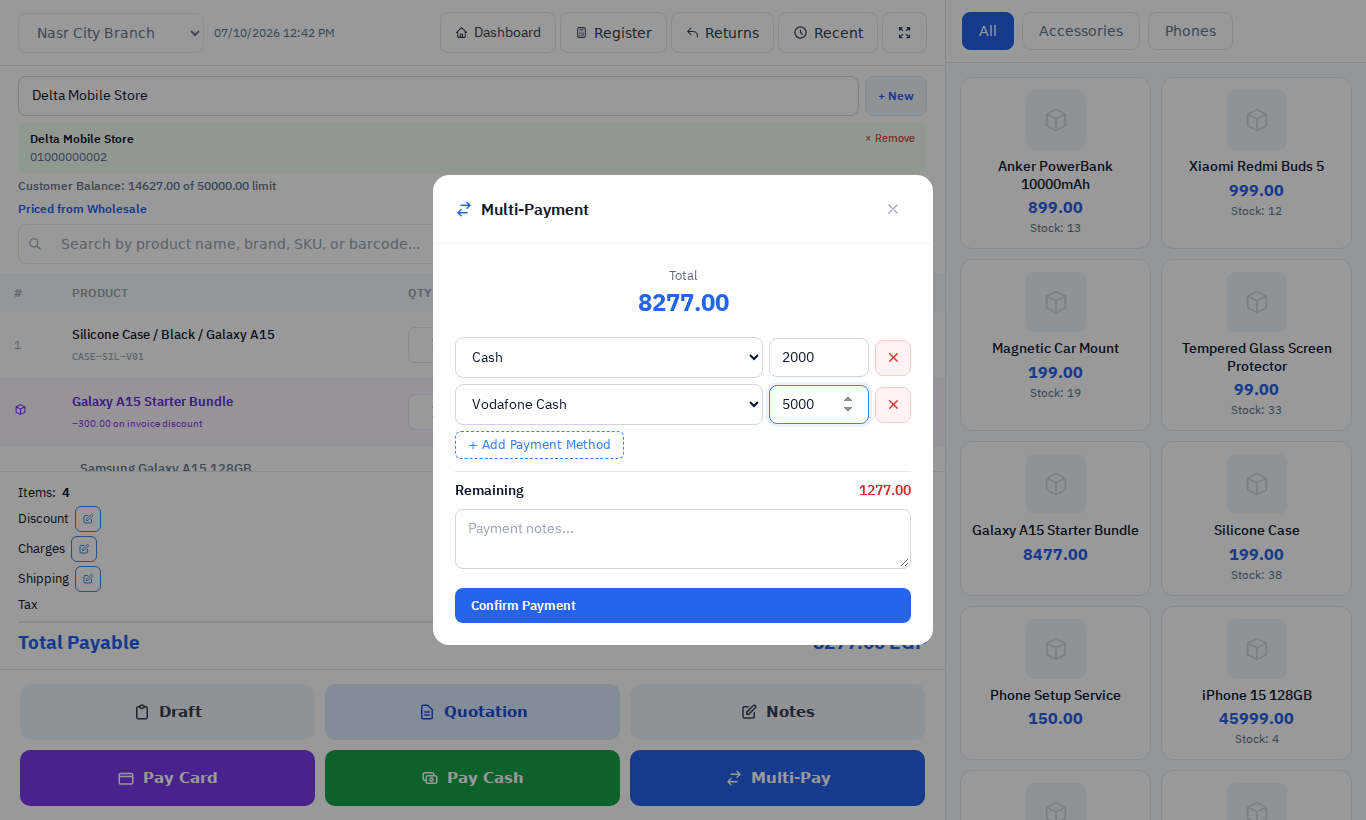
Choosing the Gift Card method on a Multi-Pay line asks for the card's code. The amount is taken off that card as the sale is saved; an unknown, expired or short card refuses the sale with the reason, and nothing is recorded. The method cannot be used without a code.
Paying more than the total
A customer may pay more than the sale comes to — to clear an older balance, or to leave credit for next time. The sale is still saved, with a notice showing the amount. With a customer chosen, the extra is held on their ledger as credit; with no customer there is nobody to hold it, so the notice asks you to choose one or give the money back.
Selling on credit
With Multi-Pay you can take less than the total. The sale is saved as Partial with the rest due, against the selected customer, and the amount due is added to their ledger balance. Collect the balance later with Add Payment.
After the sale
A green message confirms Sale INV-… completed, and the cart is emptied for the next sale.
- The stock of each product is reduced at the chosen location.
- The sale appears in Sales → All Sales, where you can print or reprint the receipt or invoice.
- Payments count towards your register session.
NoteThe POS does not print a receipt by itself. To print one, open Recent or Sales → All Sales and use Print. How documents print is set in Document settings and Printer settings.
Drafts and quotations
- Draft saves the cart without taking payment or stock, to finish later.
- Quotation saves it as a price quote for the customer.
Both appear under Sales → Drafts / Quotations, numbered DRAFT-… or QUOTE-… rather than taking an invoice number. To turn one into a sale, edit it and set its status to Final.
Stock warnings
The browse tiles show each product's stock at the chosen location, including Out of stock. A product with Manage Stock on can't be sold beyond what the location has available: if the shelf holds more than ekPOS shows, the stock figure needs correcting before the sale. See How stock works.
Other things to know
- Fullscreen: the ⛶ button hides the browser's toolbars.
- Dashboard returns to the back office in the same tab.
Returns
Click Returns in the header to enter or scan an invoice number and record a return and refund without losing your cart. Your register must be open and your role must have POS → Return.