
Branches, warehouses and zones
ekPOS tracks stock separately for every location you own. A location is either a branch (a shop that sells) or a warehouse (a store room). Warehouses can be split further into zones such as aisles or shelves.
Open Settings → Branches to manage them.
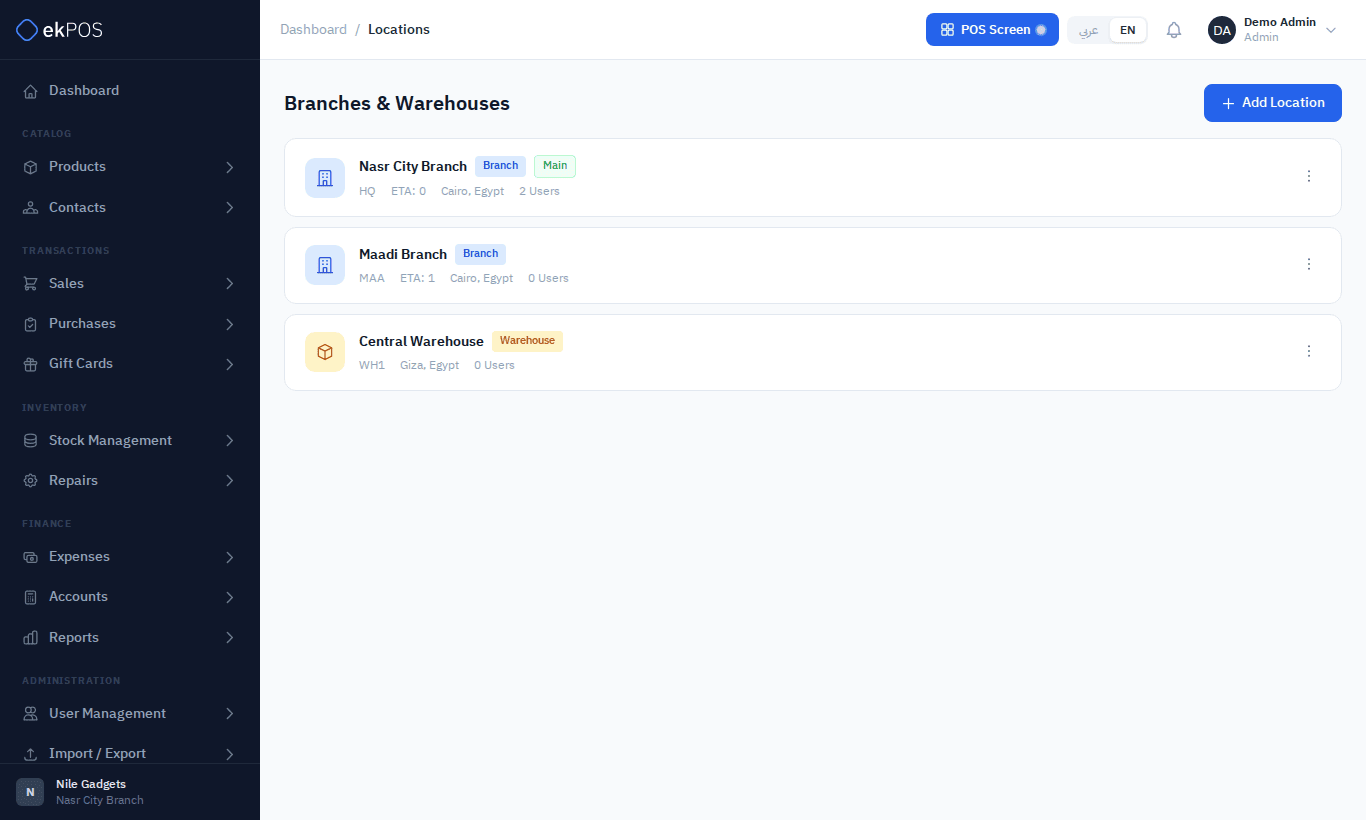
How locations work
- Every account starts with one branch, marked Main. The main location cannot be deleted or deactivated.
- Stock is held per location. Receiving a purchase adds stock to the location on the purchase; a sale takes it from the location it was made at; a transfer moves it between two locations.
- Branch or warehouse is a label on the location plus one real difference: only warehouses have zones. In a branch, all stock of a product sits in one pile.
- Each user has a home location, set on their user account. The POS and Add Sale start on that location (the user can pick another), and the dashboard's sales figures are for it.
Add a location
- Go to Settings → Branches and click Add Location.
- Fill in the form:
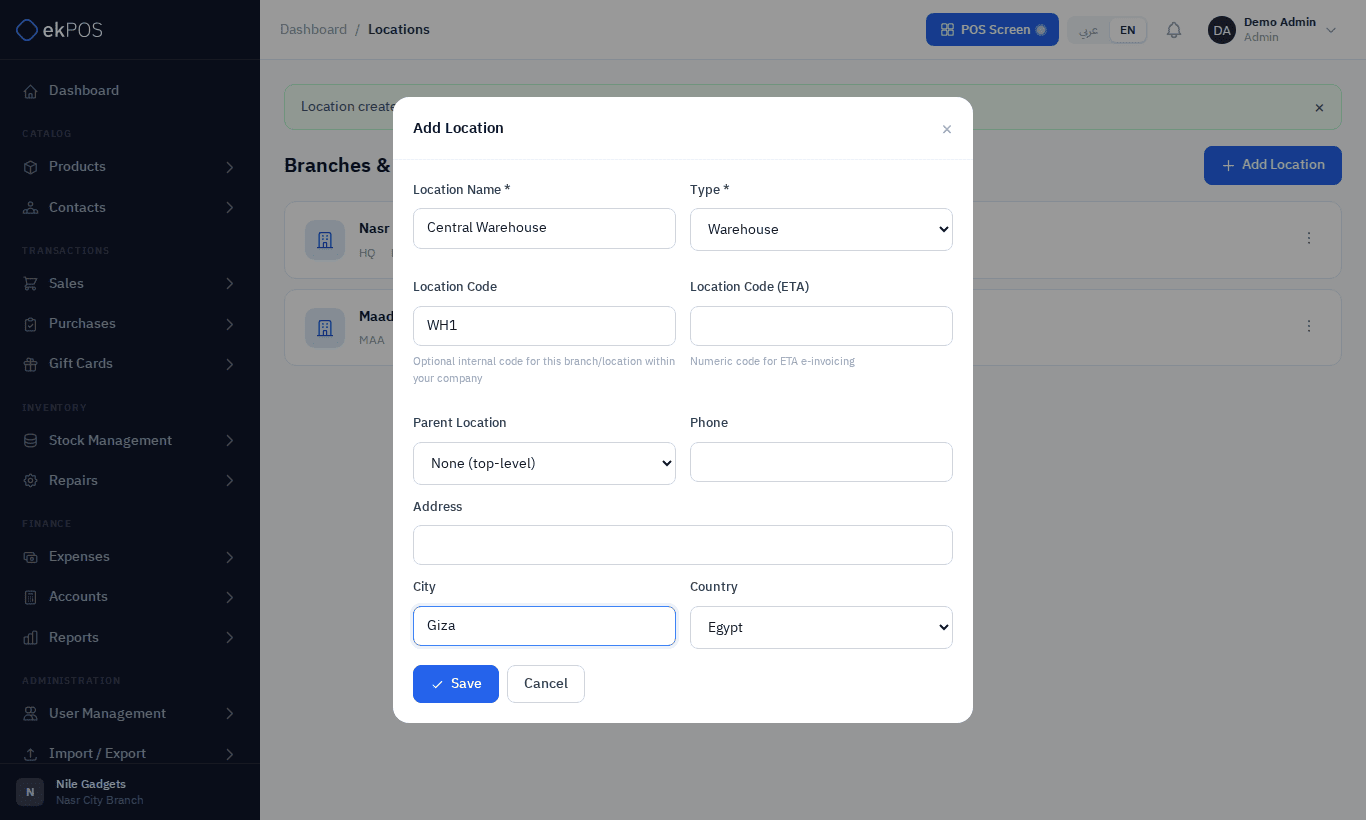
| Field | Description | Required |
|---|---|---|
| Location Name | Must be unique in your account. | Yes |
| Type | Branch or Warehouse. | Yes |
| Location Code | Short internal code such as HQ or WH1. Unique. Can be added to document numbers (see Document settings). |
No |
| Location Code (ETA) | The numeric branch ID registered with ETA. Digits only, unique. Your head office is usually 0. |
No |
| Parent Location | Optional grouping under another location. | No |
| Phone, Address, City, Country | Contact details. The address can be printed on documents instead of the business address. | No |
- Click Save.
The form checks the name and both codes as you leave each field, and tells you straight away if another location already uses them.
Edit, deactivate or delete a location
Open the ⋮ menu on the location's row:
- Edit — change any field.
- Deactivate / Activate — an inactive location is hidden from the location pickers across the app (for example on new purchases and transfers). Its stock and history stay.
- Manage Zones — warehouses only; see below.
- Delete — removes the location.
You cannot delete a location that still holds stock. Transfer or adjust the stock out first. The main location cannot be deleted or deactivated.
Zones (warehouses only)
Zones let you record where inside a warehouse stock sits, such as "Aisle A" or "Cold room".
- On a warehouse row, open ⋮ → Manage Zones.
- Click Add Zone, enter a Zone Name and a short Code (for example
A1), and optionally a description. - Click Save.
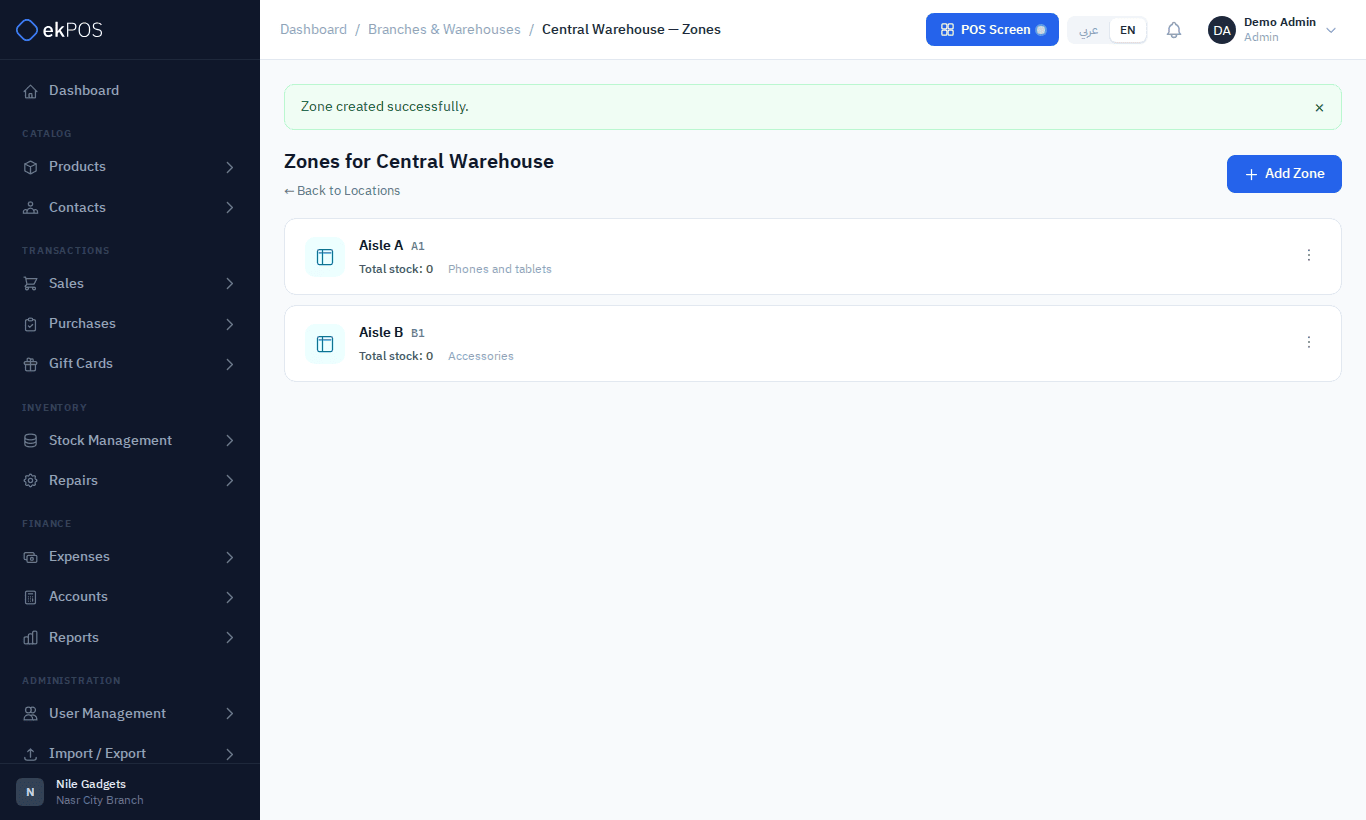
How zones are used today:
- Inventory audits can count one zone of a warehouse at a time. See Inventory audits.
- Integrations can place stock in a zone: stock adjustments made through the REST API, and the zone WooCommerce orders are taken from.
- The ekPOS screens work at warehouse level. Receiving a purchase, transfers, adjustments and opening stock entered on screen have no zone picker, so that stock goes into the warehouse's Unassigned zone, and a sale made at the warehouse is taken from it. Every zone counts in the warehouse's totals.
Every warehouse has a locked Unassigned zone. It is created with the warehouse, or when you change a branch to a warehouse, and the stock that branch held moves into it. It cannot be renamed, deactivated or deleted.
Each zone shows how much stock it currently holds. You cannot delete a zone that still holds stock; transfer it to another zone first.
NoteZone names and codes only need to be unique within their own warehouse.
Who can do this
Locations → View / Create / Edit / Delete for locations, and Zones → View / Create / Edit / Delete for zones.
Plan limits
Your subscription may cap how many active locations you can have. When you reach the cap, Add Location shows You have reached the maximum number of locations allowed on your current plan. Activating a deactivated location counts the same way.
Related
- Stock transfers: move stock between locations and zones.
- Users: assign each user to a location.
- Inventory audits: count a location, or one zone of a warehouse.