
Printers and labels
Two settings pages control printing hardware:
- Settings → Printer Settings — how documents and labels are sent to the printer.
- Settings → Barcode Settings — what a product barcode label looks like.
Print methods
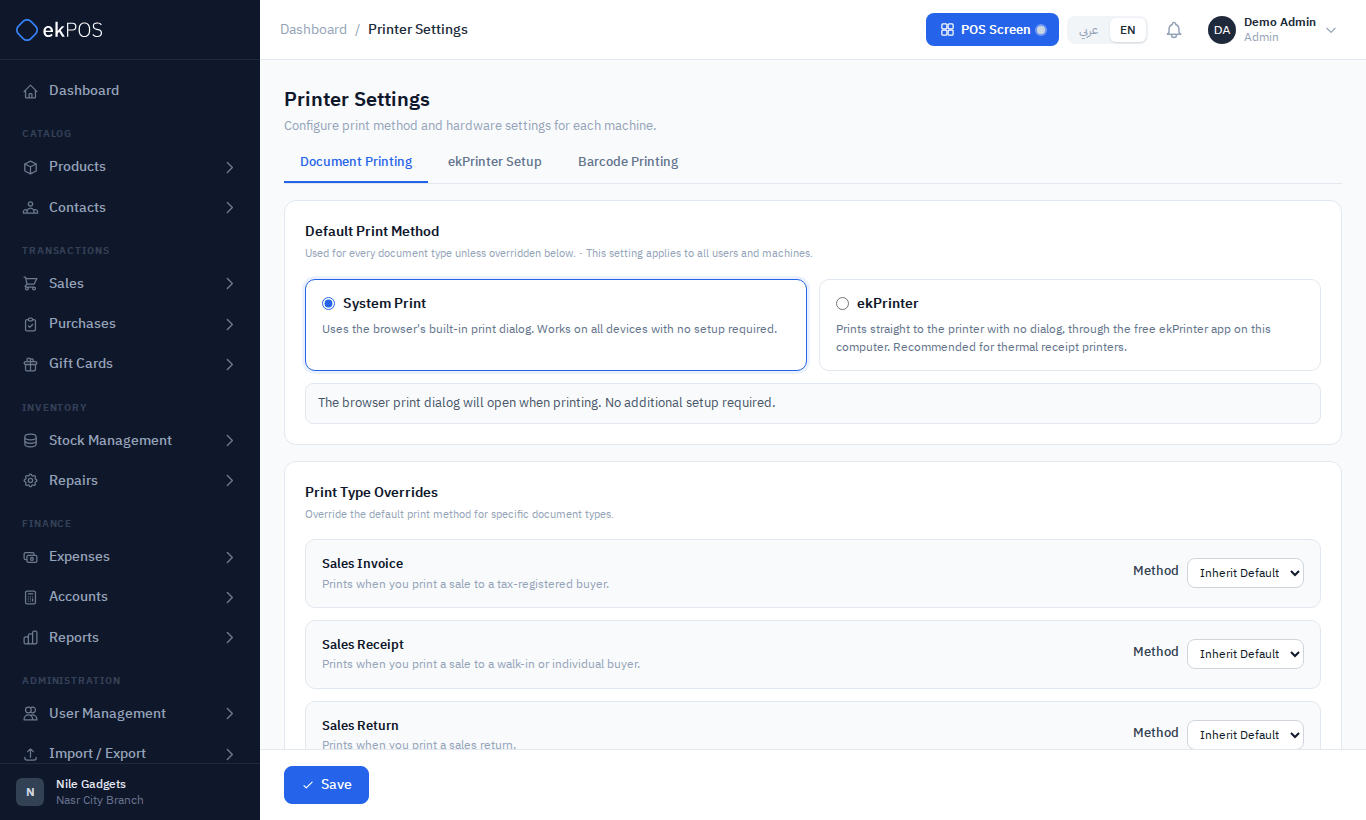
ekPOS can print in two ways:
| Method | How it works | Use it for |
|---|---|---|
| System Print | Opens your browser's print dialog. Works on any device with no setup. | Paper printers, and any shop that doesn't need silent printing. |
| ekPrinter | Sends the document straight to a named printer, with no dialog. Needs the free ekPrinter app installed and paired on each Windows computer that prints. | Thermal receipt and label printers at the till. |
If ekPrinter is chosen but can't print — it isn't running, it isn't paired, or no printer is chosen on that computer — ekPOS opens the browser's print dialog instead, so a sale is never left without its receipt.
Document Printing tab
- Default Print Method — System Print or ekPrinter, for every document type.
- Print Type Overrides — pick a different method for particular documents, for example ekPrinter for receipts but System Print for purchase orders. With ekPrinter you also choose the printer; that choice is remembered on this computer only.
- Receipt Printer Settings (ekPrinter only) — the number of receipt copies, and whether to open the cash drawer (and on which pin) after printing a sales receipt.
Receipts printed through ekPrinter come out exactly as long as the receipt, so the printer cuts under the last line.
ekPrinter Setup tab
Set up each computer that prints silently, once:
- Click Download ekPrinter and run the installer. It needs no administrator rights. Windows may warn that the publisher is unrecognised, because the installer is not code-signed yet: click More info, then Run anyway.
- When it finishes, the ekPrinter page opens with a six-digit pairing code. ekPrinter then runs by the clock and starts by itself with Windows.
- Back on this tab, click Test Connection. If the browser asks whether ekPOS may access devices on your local network, allow it.
- Type the pairing code and click Pair. Only sites paired this way can print to that computer or open its cash drawer.
- Choose the printer for each document type on the Document Printing tab.
The tab also shows the printers on that computer, with any that are offline or out of paper marked, and the ekPrinter Port (leave it at 8421 unless it was changed in ekPrinter itself). To see the pairing code again, double-click the printer icon by the clock. To stop a site printing to a computer, remove it on the ekPrinter page.
Barcode Printing tab
The method and number of copies used when printing barcode labels, and the label printer on this computer.
NoteSettings marked This setting is saved on this device only — the chosen printers and the ekPrinter port — must be set on every computer. Everything else applies to all users and computers.
Barcode label design
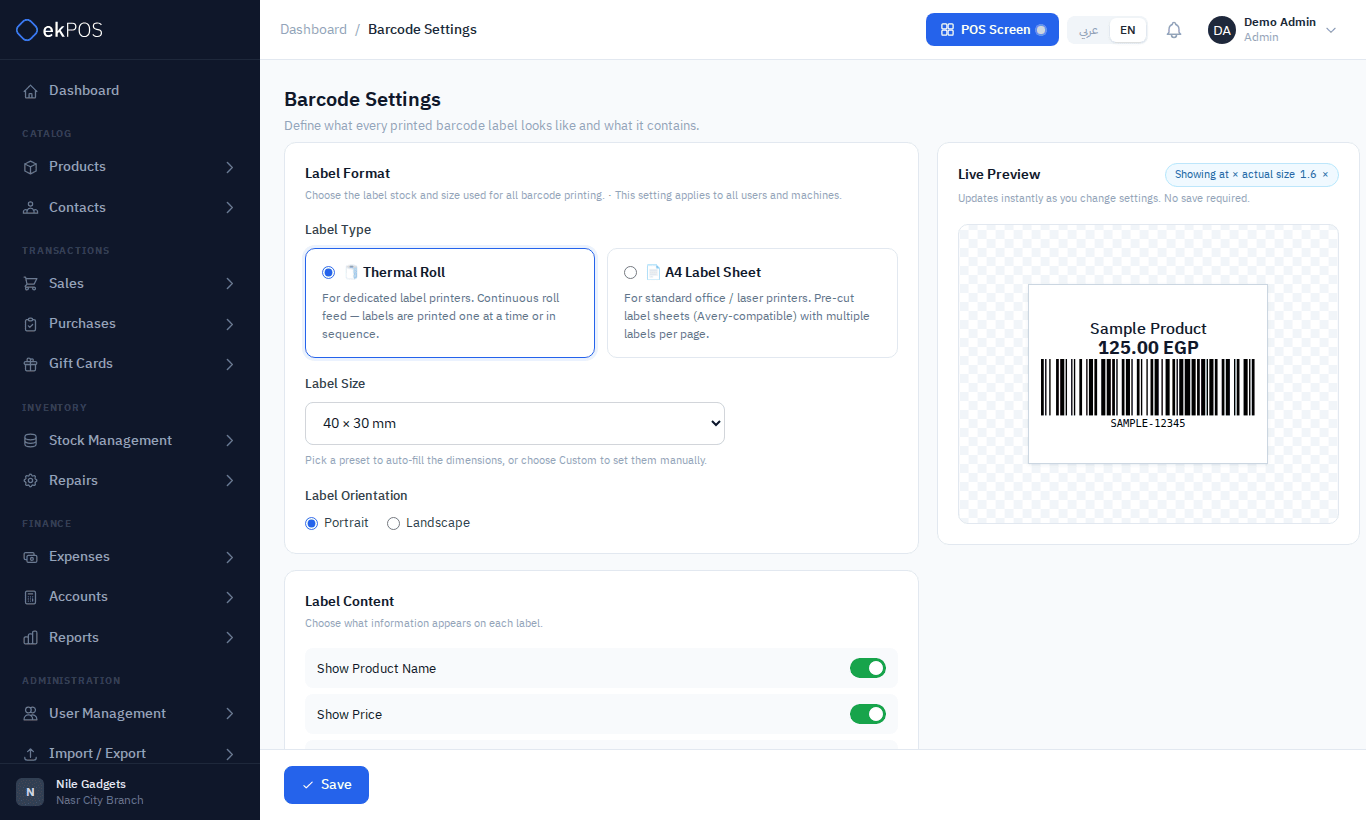
The Live Preview on the right updates as you change settings.
| Section | Settings |
|---|---|
| Label Format | Thermal Roll (label printer, one label at a time) or A4 Label Sheet (pre-cut sheets on an office printer); label size from a preset or custom width × height in mm; orientation. |
| A4 Sheet Layout | Labels per row and column, top/left margins, and the gaps between labels. |
| Label Content | Show product name, price (sale or cost price), SKU, the barcode number, branch name, business name, and a custom text line such as Made in Egypt. |
| Label Appearance | Barcode height (5–30 mm), font size, and padding. |
The barcode type (Code 128, EAN-13 and so on) is not set here. It belongs to each product. See Barcodes.
Who can do this
Both pages need Settings → Manage.