
Returns and refunds
A sales return takes goods back from a customer against the original sale, puts them back into stock, and records any refund.
Start a return
From Sales → All Sales, open ⋮ → Sale Return on the sale. You can also start from Sell Returns by finding the sale first.
Only a final sale can be returned. A draft, quotation or proforma has not sold anything, so it has no Sale Return action.
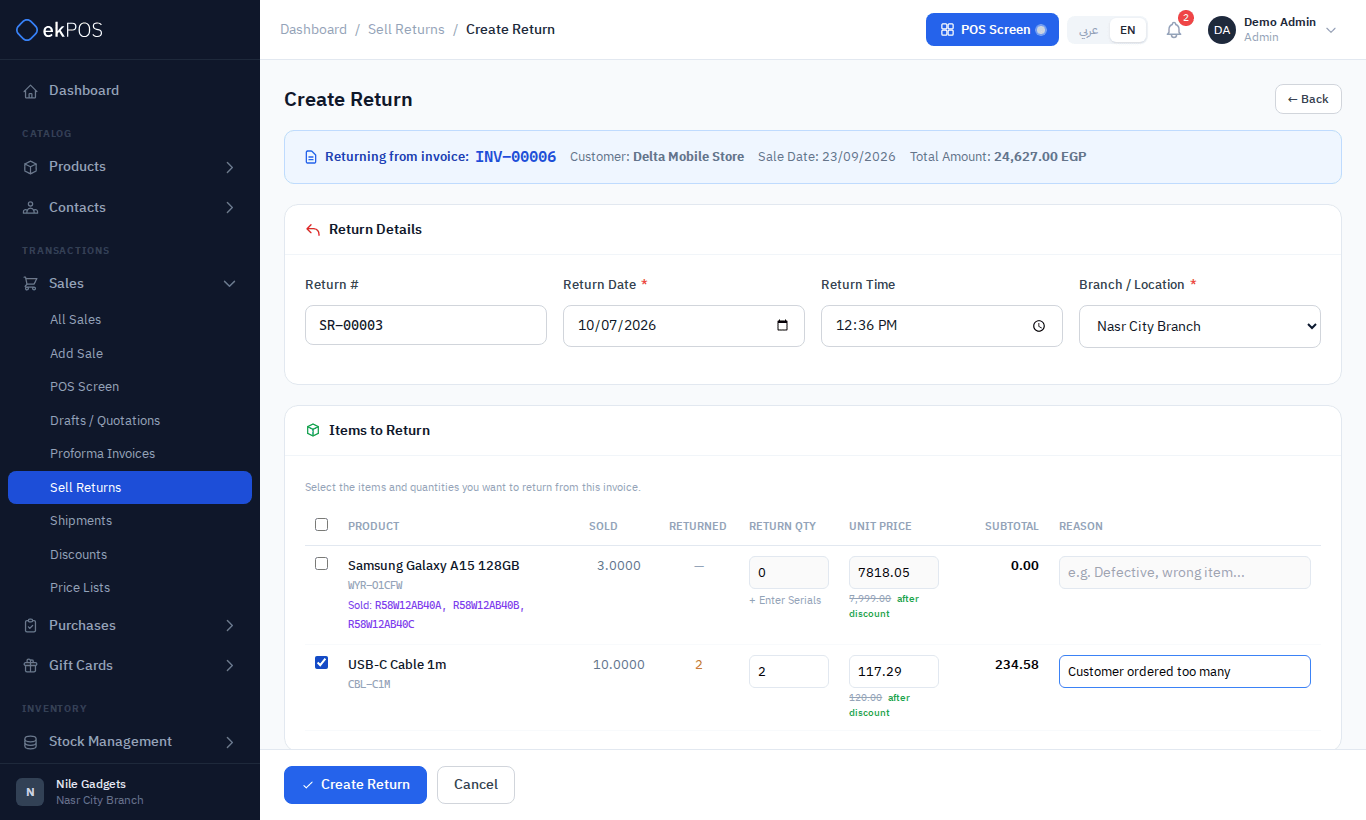
The return page shows the original invoice, the customer, the sale date and total.
From the POS
With a register open, click Returns between Register and Recent. Enter the invoice number or scan the invoice's barcode, then press Enter or click Find invoice. Only a final invoice from your business can be returned; both POS receipts and invoices from Add Sale work.
The same return form opens in a dialog while your current cart stays in place. Select the products and quantities, enter serials when required, choose the refund method and amount, and add notes. Returned goods go to your open register's branch. After confirmation, you can print the return receipt or A4 document and close the dialog to continue selling. The refund is included in that register's figures.
POS → Return in Settings → Roles controls this button and the POS return endpoints. It is enabled by default for Cashiers; owners can turn it off or grant it to another role. Sales → Return separately controls returns from the sales screens.
Create the return
- Check the Return # (SR-00001…), the Return Date and Return Time, and the Branch / Location the goods come back to. It starts on the sale's location. Neither the return nor its refund can be dated later than now. For a customer, the form also shows their current ledger balance: red when they owe you, green when you owe them.
- Tick each line being returned and enter the Return Qty. You cannot return more than was sold, less anything already returned; the Returned column shows what has already come back.
- The Unit Price is what the customer actually paid per unit — after any line or invoice discount, including tax. Change it if you are refunding a different amount. When a discount applied, the crossed-out original price also includes tax; tax alone does not show an “after discount” hint.
- Give a Reason.
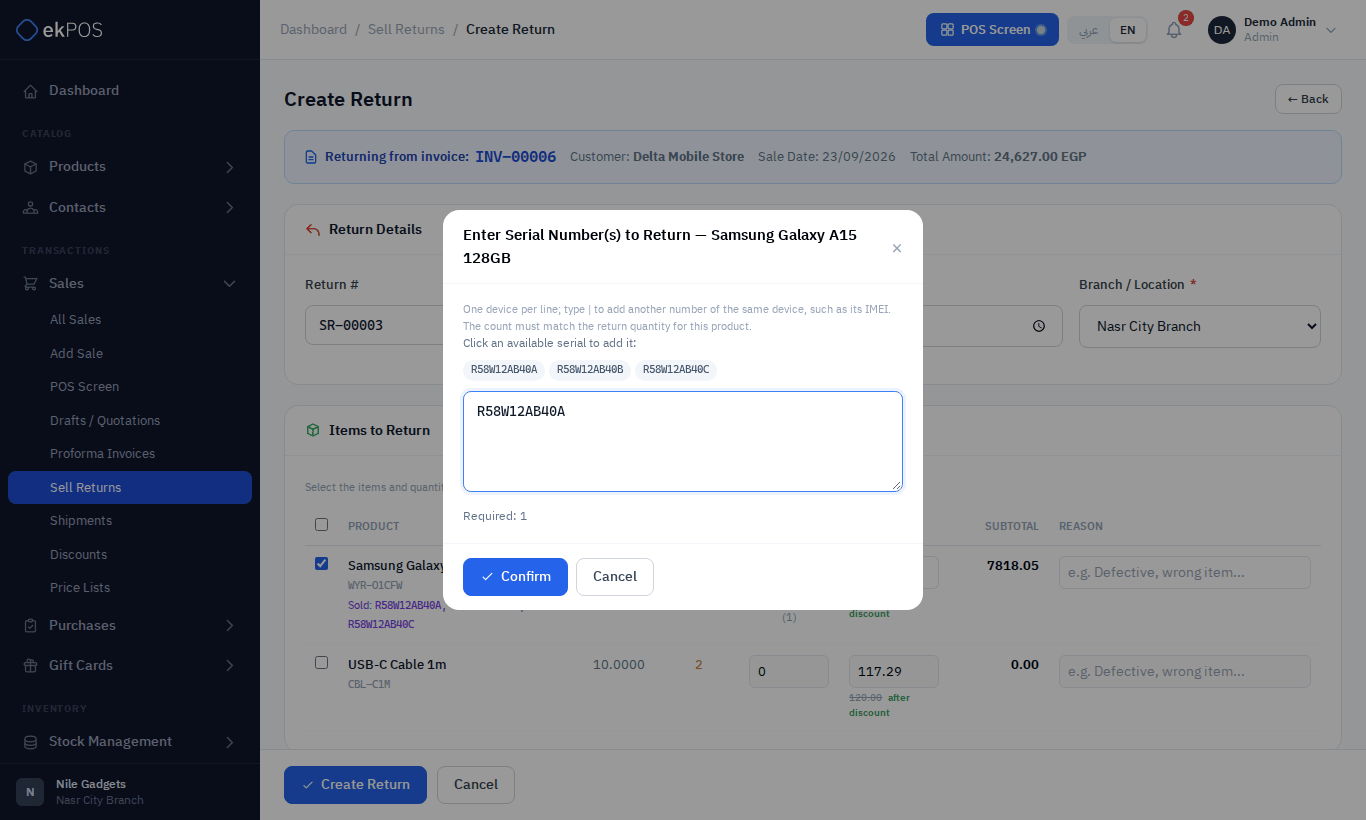
- For a serial-tracked product, enter the Return Qty first, then click + Enter Serials and enter one device per line, one for each unit. The serials sold on the invoice are shown as a hint; click one to add it. For a phone, scanning just one of its numbers (the serial or either IMEI) is enough — the return records the whole device.
- Choose a Payment Method and Refund Amount if you are giving money back now. Leave it on No refund now to refund later; for a customer, the amount stays on their account as a credit. A walk-in sale has no account to hold a credit, so a return from a paid walk-in sale starts with the refund filled in, by the method the sale was paid with (or cash). If you save one without refunding it in full, ekPOS saves it but warns you.
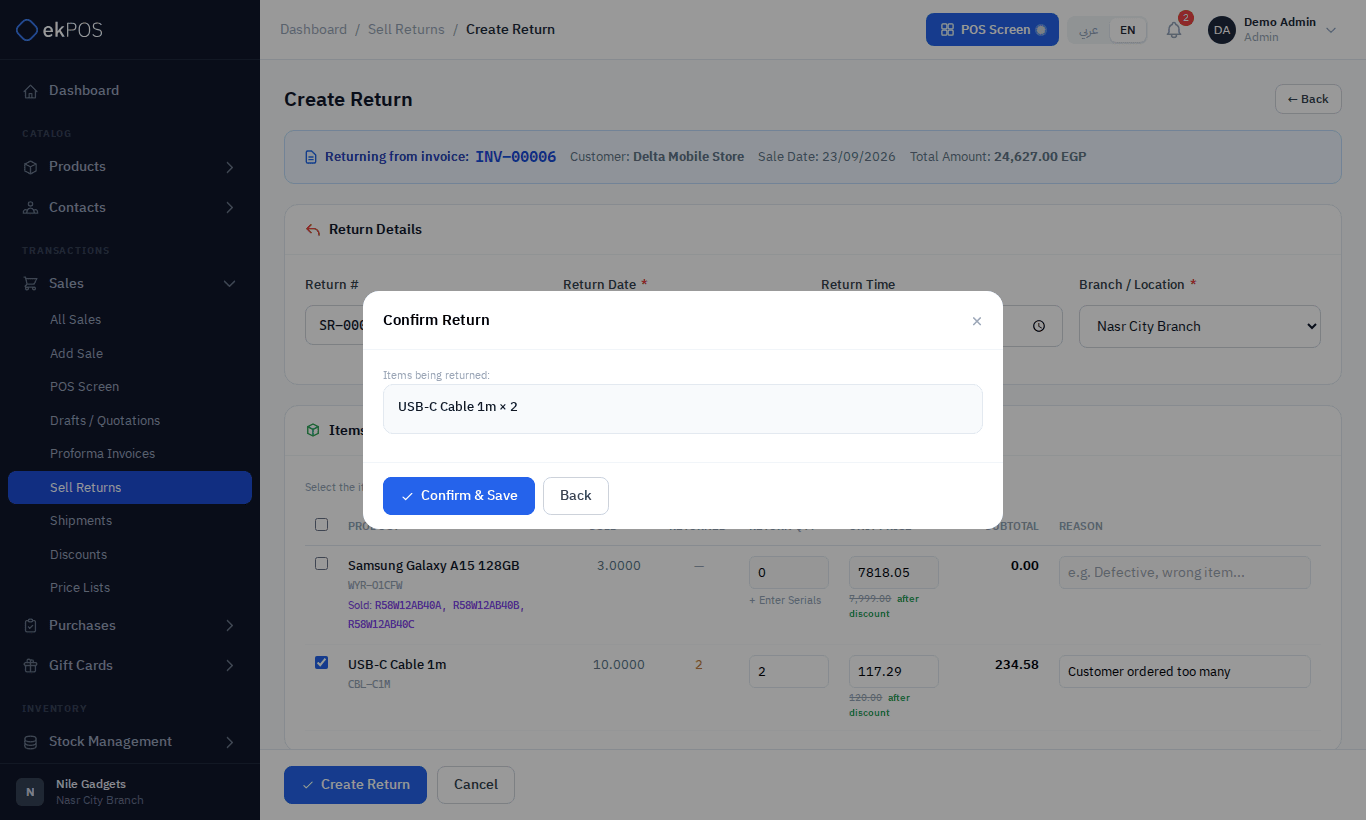
- Click Create Return, check the summary, and click Confirm & Save.
Refunds and the customer's account
The Refund & Payment panel works out the effect:
| Situation | Account Impact |
|---|---|
| Refund equals the return total | Fully settled |
| Refund is less than the return total | The rest is credited to the customer's account |
| Refund is more than the return total | Shown as an overpayment |
The return total is split into goods and the tax on them.
What happens when you save
- Returned quantities go back into stock at the return's location.
- The refund, if any, is recorded against the return.
- For a customer, the return and refund are written to their ledger.
- Serials returned are marked as returned and their warranty as voided, so selling the same unit again does not trigger a duplicate-serial warning.
- On plans with accounting, the return, the tax and the refund are posted.
The returns list
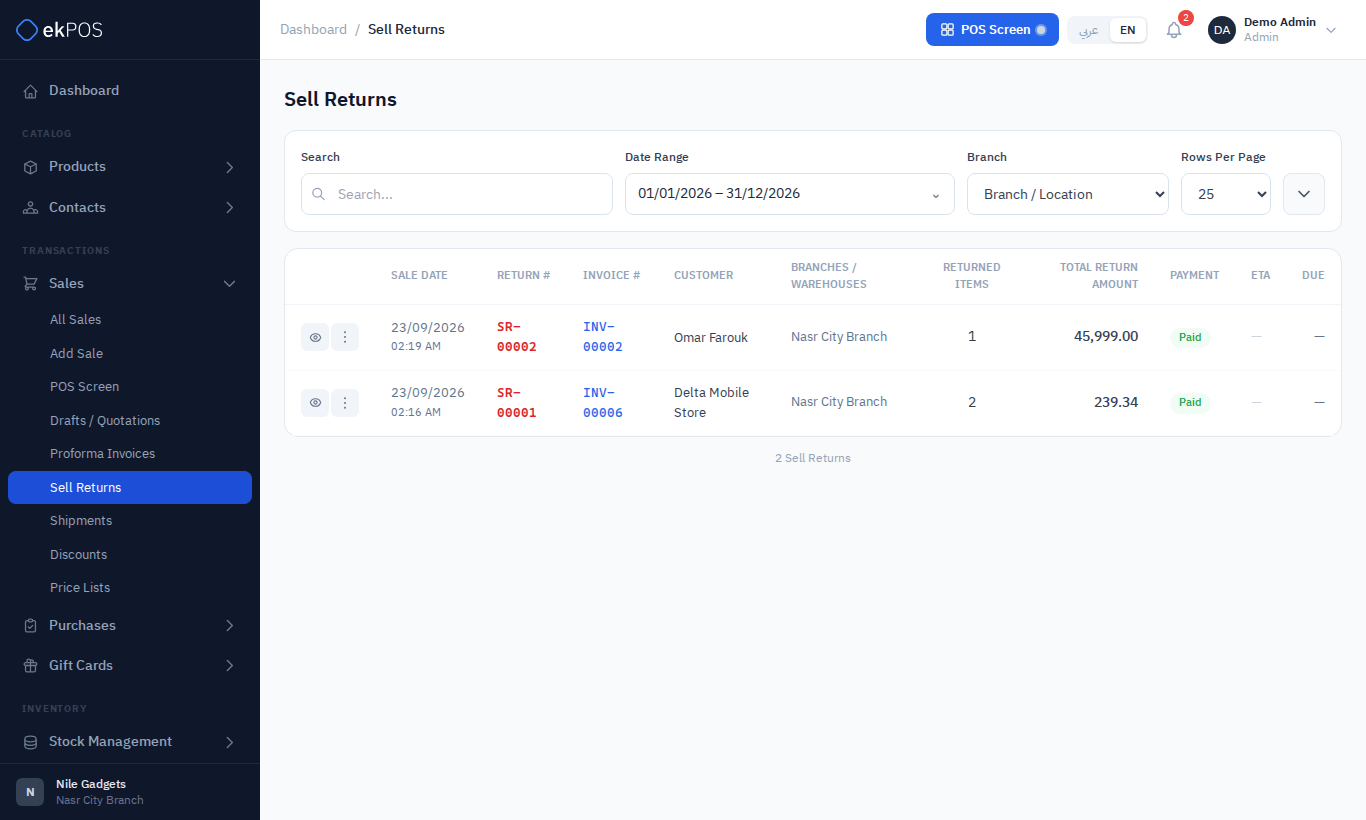
Sales → Sell Returns lists every return with its date, return number, original invoice, customer, location, number of items returned, total, refund status, ETA status and amount due. Search and filter by payment status, location and date.
The ⋮ menu on a return offers:
| Action | What it does |
|---|---|
| View Invoice | Opens the original sale. |
| View Customer | Opens the customer's ledger. |
| Prints the return note. | |
| Add Payment | Pays out a refund not given at the time. |
| View Payments | Lists the refunds paid. |
| Submit credit note to ETA | Reports the return to ETA when the original sale was e-invoiced. |
| Delete | Deletes the return and takes the goods back out of stock. |
A return cannot be deleted once a credit note for it has been filed with ETA; cancel the document with the Tax Authority instead.
Exchanges
To swap an item: create the return, then create a new sale for the replacement and enter the return's reference in the sale's Related Return # field. The two documents are linked, and the sale shows the return it replaced.
Who can do this
Creating returns and paying refunds needs Sales → Return. Deleting returns needs Sales → Delete.
Related
An invoice must be within the sale return period configured in Business Settings. This applies to Add Return and POS; an expired invoice cannot be returned by entering an earlier return date.